AI Summarise
Select your AI for quick analysis of the article:
Tips for Designing Your Kitchen Island
- Define the purpose of your island before choosing shape or size
- Ensure spacing and circulation suit your household’s workflow
- Select a shape that supports your kitchen layout
- Plan seating early, including heights and overhangs
- Decide whether to include a sink or cooktop
- Prioritise smart, functional storage
- Choose durable, beautiful materials
- Incorporate thoughtful lighting for both task and ambience
- Avoid common design mistakes with expert planning
A well-designed kitchen island can completely transform how you cook, entertain, and move through your home. It’s often the centrepiece of the kitchen — the place where your family gathers, guests linger, and everyday tasks become effortless. Because the island carries so much functional and visual weight, getting the design right is essential.
Below, our interior designers at The Maker Designer Kitchens share the key considerations that shape how to design a kitchen island.
Start with the purpose of your island
Every great kitchen island begins with a clear purpose. Before thinking about material colours, shapes, or pendant lighting options, determine how you actually plan to use the space.
Ask yourself:
- Do you cook often and need generous prep space?
- Will the island be used for seating or casual meals?
- Do you entertain regularly?
- Do you need cleaning or cooking zones on the island?
- Should it incorporate smart technology or hidden appliances?
- Is storage a must-have on your kitchen island?
Your answers define whether your island becomes a cooking hub, a social zone, a storage workhorse, or a combination of all three.
This clarity allows our designers to map out ideal placement for sinks, power points, drawers, and working zones so your kitchen functions beautifully from day one.
Get the size and spacing right
The right proportions ensure your island enhances — rather than restricts — how you move through the kitchen.
As a guide:
- Aim for at least 900–1200mm clearance on all sides
- Ensure multiple people can work comfortably at once
- Allow direct, unhindered paths between fridge, cooktop, and sink
- Consider how children or guests move through the space
Perth homes with open-plan layouts often benefit from longer islands that create natural zoning between cooking, dining, and living areas. Smaller kitchens can still support an island when spacing is carefully planned.
Choose the right shape and layout
Your island’s shape should support your daily routines and complement your kitchen layout.
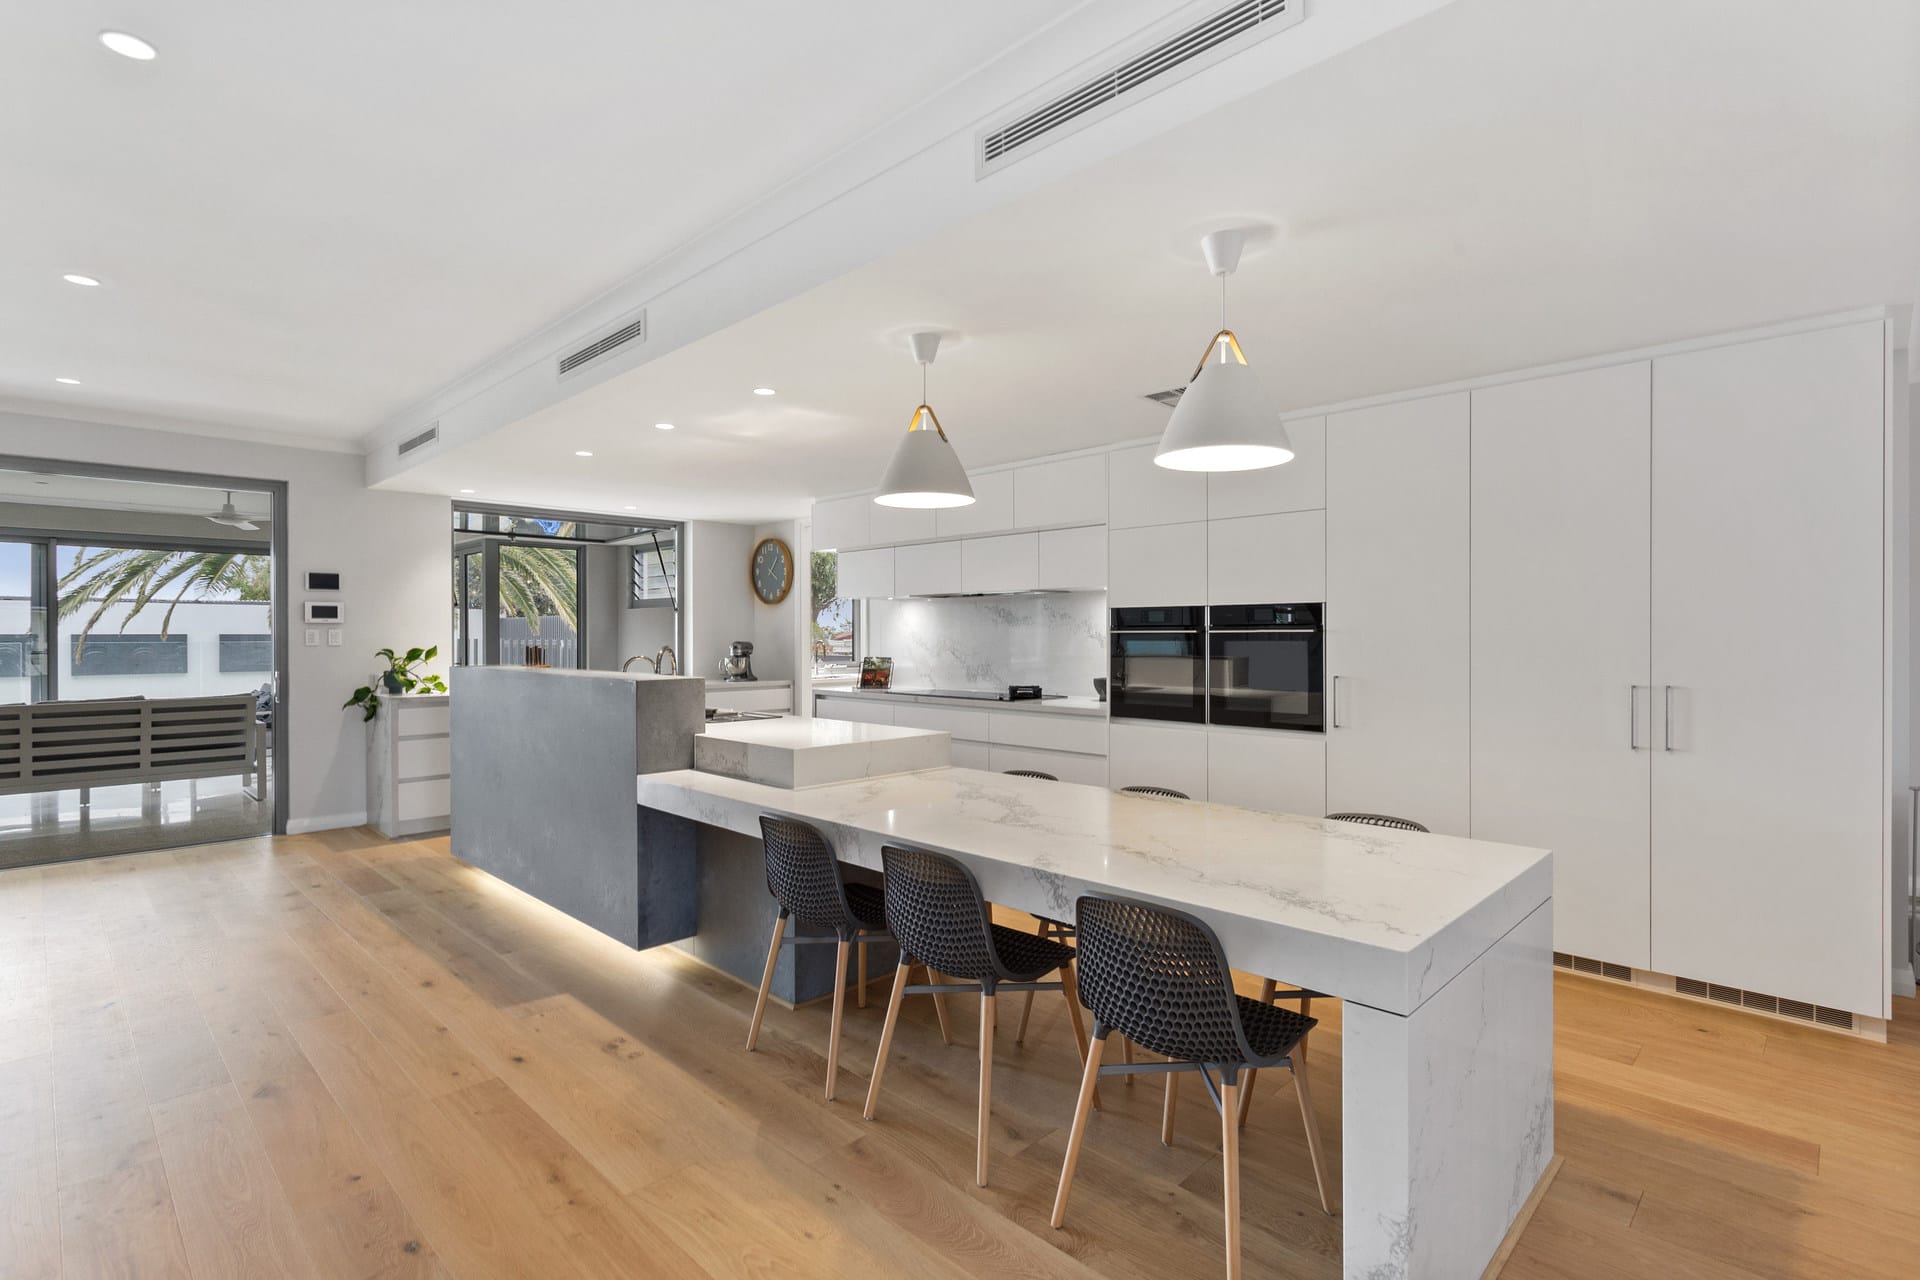
Rectangular islands
The most versatile option, offering generous workspace and seating.
Square or compact islands
Ideal for smaller kitchens or where symmetry is desired.
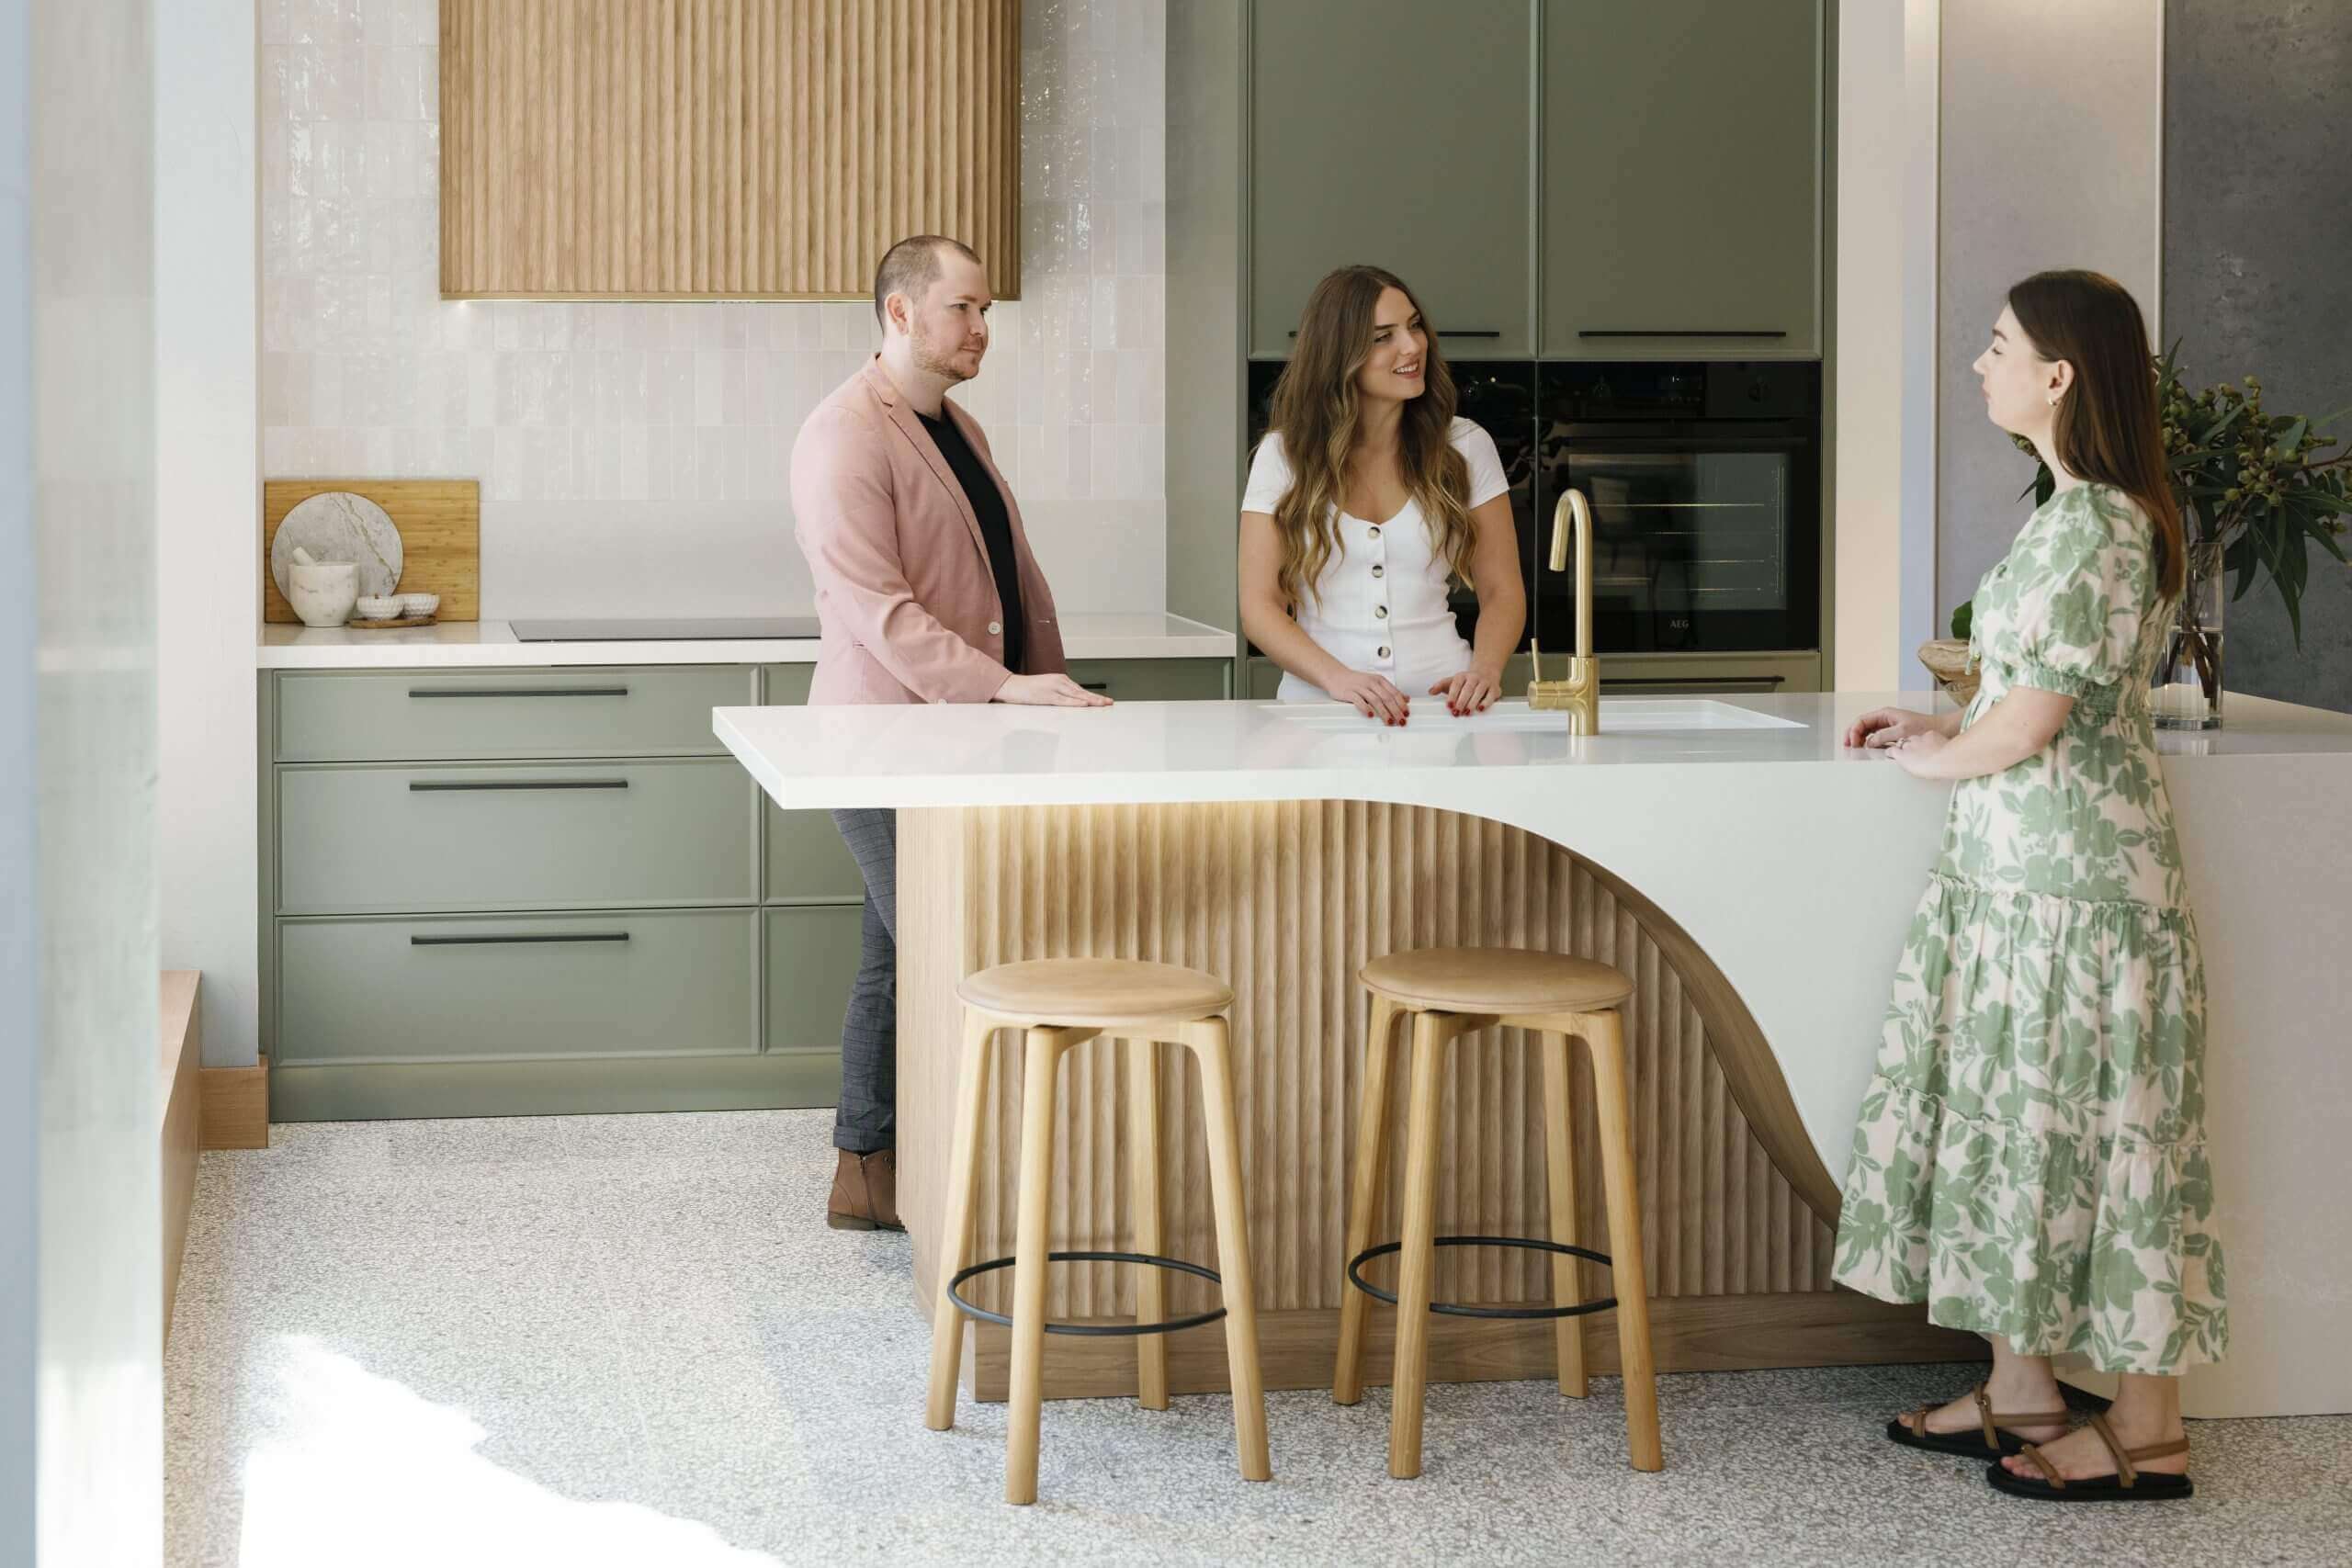
Curved islands
A major trend, softening the space and enhancing flow. Curves bring a sculptural, luxurious feel and work beautifully with stone-wrapped fascias.
Layered islands
Perfect for combining prep zones with dining sections, especially in family homes.
Double islands
A premium option in large contemporary homes, creating separate cooking and entertaining zones.
Your kitchen’s layout, if it’s L-shaped, U-shaped, or open plan, will determine which island shape feels natural and functional for your space.
Plan island seating early
Seating shouldn’t be an afterthought. It affects overhang depth, island height, stone thickness, and legroom.
Consider:
- Overhang depth (typically 300mm+) for comfortable seating
- Stool height (bench height vs bar height)
- Single or double-sided seating
- Cantilever or layered designs for a floating, contemporary look
Family-friendly layouts often use lowered seating sections or deeper overhangs to make the island more versatile for dining, homework, or entertaining.
Decide whether to include a sink or cooktop
This decision defines how your island functions.
Include a cooktop if:
- You enjoy cooking socially
- You want the island to be a true working hub
- You plan to incorporate a feature rangehood or downdraft system
Pitt Cooktops, which integrate directly into stone, create a premium, architectural look.
Include a sink if:
- You want the island to support cleaning and prep zones
- You prefer the main cooktop along a back run
A secondary prep sink is often ideal for large kitchens or households that cook daily.
Keep the island clear if:
- You want a strong visual feature
- You use the island for dining or entertaining
- You prefer uninterrupted stone surfaces
Our designers help you position sinks and appliances to maintain symmetry, minimise joins, and support workflow.
Maximise island storage
A well-planned island dramatically increases your kitchen’s storage capacity.
Consider integrating:
- Wide banks of drawers for pots, pans, and everyday utensils
- Custom drawer heights for spices, containers, and small appliances
- Double-sided storage for additional access
- Appliance cupboards to hide toasters and kettles
- Wine fridges or beverage drawers
- Smart technology like Hafele Point Pods and integrated charging
This is where thoughtful design transforms your island from ‘just bench space’ into a functional, multi-use area.

Choose materials that elevate your design
Your island surface is one of the most hard-working areas of the home, so choosing the right material is essential.
Why we recommend Caesarstone engineered stone
- Non-porous and stain-resistant
- Heat and scratch resistant
- Easy to clean
- Available in a wide range of colours and veined styles
- Supported by a lifetime warranty
Veined stones such as Empira White, Statuario Maximus, or Rugged Concrete create a luxurious, contemporary look. Waterfall edges, stone fascias, curves, and split-level islands enrich the design with depth and visual impact.
Our team uses specialised software to vein-match slabs perfectly, ensuring joins are precise and the final result is seamless and refined — a hallmark of luxury kitchen craftsmanship.
Light your island beautifully
Lighting is critical to both functionality and mood.
Consider:
- Pendant spacing: usually 600–800mm apart
- Pendant height: ~700–850mm above benchtop
- Task lighting: ideal for prep zones
- Layered lighting: warm LEDs, strip lighting, dimmers
Lighting can transform your island into a dramatic feature during the evening while ensuring perfect visibility during cooking.
Common kitchen island mistakes to avoid
- Choosing an island that’s too large for the space
- Leaving insufficient walkway clearance
- Forgetting power points or charging zones
- Overcrowding the island with both a sink and cooktop
- Selecting materials that don’t suit your lifestyle
- Mirroring looks seen online instead of designing for daily use
An island should enhance your home, not overwhelm it. Thoughtful planning prevents costly redesigns later.
Design your dream kitchen with The Maker Designer Kitchens
As one of Australia’s largest and most awarded kitchen manufacturers, The Maker Designer Kitchens brings unmatched expertise to every detail — from layout to storage, lighting, stonework, and cabinetry.
Our in-house team of interior designers, cabinet makers, and stonemasons craft luxury island designs tailored to your lifestyle and your home.
Visit our showroom to explore working kitchen displays, premium materials, and the latest innovations — or book a consultation with our design team to begin your renovation journey.
FAQs about kitchen islands
How big should a kitchen island be?
Most islands range from 2.2–3.5 metres, but the ideal size depends on your kitchen layout and required circulation space.
Can a small kitchen have an island?
Yes — with careful planning. Compact, square, or mobile islands can work beautifully in smaller Perth homes.
Should I put a sink or cooktop in my island?
It depends on your workflow. Cooktops suit social cooks; sinks suit cleaning/prep zones. Clear islands suit entertainers.
What materials are best for an island?
Durable, low-maintenance surfaces like engineered stone offer longevity, beauty, and high performance.
Do I need lighting over my kitchen island?
While not essential, pendants or task lighting significantly improve visibility and ambience.